Quick Links
Apple users are often not particularly thrilled when using Windows, and there are many reasons for it. The main complaint, however, is usually the same - these two systems do not really play that nice with one another. Some features are incompatible, and it’s just a hassle to do anything between these two very different ecosystems.
However, you’d not expect any trouble in some places, such as simply transferring photos between these two. Unfortunately, for some years now, even this has been quite difficult. It all comes down to the file format that iPhones use for their photos - HEIC.
What is an HEIC file?
HEIC is a file format that was introduced to iPhones in 2017. It works on every iPhone running iOS 11 or newer, starting from the iPhone 7. It is also a default photo format on MacOS starting from MacOS High Sierra.
The name stands for High Efficiency Image Container, and the file format was designed exactly that - compress images with high efficiency without a big loss in their quality, so you don’t have to delete your photos all the time.
HEIC files also enable some well-known iPhone camera functionalities, such as Live Photos. This is possible because the file format can store multiple images in one file. This means that created animations are smooth and much better quality than comparable GIFs.
Is HEIC better than JPEG?
Even though HEIC is a much newer file format than JPEG, it’s not that easy to say which is better.
There are clear advantages to HEIC files. They usually take up half the size of similar JPGs, meaning that your device's storage will be used much more efficiently, letting you take more photos before cleaning up your drives. Moreover, these files offer much better quality compression - they even support 16-bit color and retain your edit history.
However, it’s not all sunshine and rainbows. The first problem with HEIC is that Apple owns it. This means that other companies are not as eager to use it, and adopting this format outside the Apple ecosystem isn’t great.
This means HEIC files work great across Apple smartphones, tablets, and laptops but are often incompatible with Windows, Android, or Linux devices. What’s more, you can also find a lot of apps that do not support this kind of file format and require you to use either JPG or PNG.
So, it’s true that JPEGs are generally lower quality, bigger files. However, their strength lies in their compatibility. Once you have a JPEG file, you can expect it to be supported everywhere without the need for any additional software or conversions.
How to open HEIC files on a Mac?
As we’ve said, HEIC is the default photo format on both iOS and MacOS. This means that opening these files on Apple devices should pose no problem at all, as they are all natively supported within Apple’s ecosystem.
Therefore, to open HEIC files on a Mac, you should double-click it. They’ll open automatically in your default photos app.
How to open HEIC files on a Windows PC?
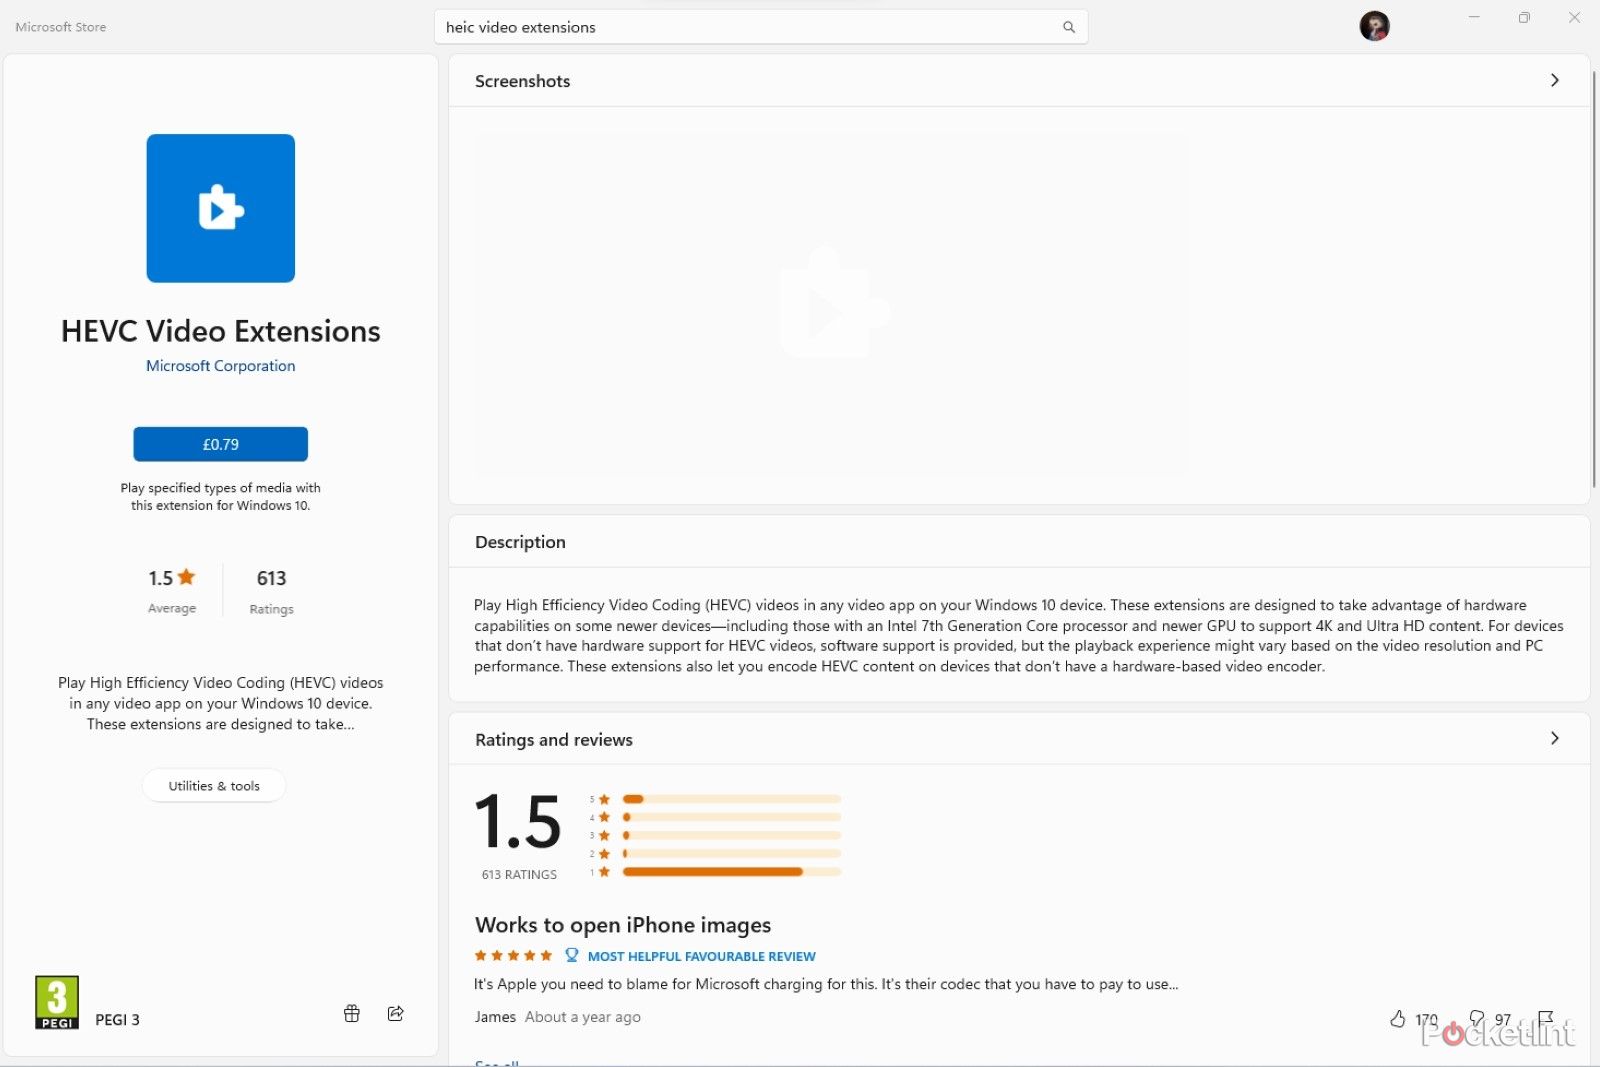
Unfortunately, opening HEIC files on Windows is not as easy. HEIC is Apple’s proprietary file format, so it is not natively supported in Windows’ default Photos app. Therefore, you’ll need to download an optional plugin to open these files.
Downloading the plugin is, fortunately, extremely easy. The plugin is called HEVC Video Extensions, and you can download it from the Microsoft Store. Unfortunately, it isn’t free - it’ll cost you $0.99/£0.79.
Once you’ve downloaded the plugin, Simply double-clicking on the HEIC file will open it in the default Photos app, just like any other supported file format.
Of course, you can also convert the HEIC files to other formats, foregoing getting the plugin. We’ll discuss how to convert these files later on in the article.
How to open HEIC files on Android?
Fortunately, you don’t have to deal with HEIC file incompatibility on the Android side. Google Photos, or Google’s native Files app, both support these formats out-of-the-box. That means you can easily open these files without any additional downloads or conversions - tap them, and they’ll open like any other photo.
How to convert HEIC files to JPEG or PNG?
Sometimes, converting HEIC files to more widely supported formats is a must. Some machines refuse to work with the newer file system. Sometimes you don’t want to deal with the quirks of the proprietary files. Fortunately, the process is extremely easy and shouldn’t take long.
Before converting, you should remember that you’ll most likely lose some quality (or make your files much bigger) by converting them from HEIC to JPEGs. That’s the price you have to pay for compatibility.
If you’re sure that you want to convert, the process is extremely easy. The best way to do it on Windows if you don’t want to download any other software would be to use an online converter. They usually have limits concerning the number of free conversions, but if you use the feature sparsely, you shouldn’t really worry about it. Here are some good examples:
Of course, you might also want to use software to do this job for you. The easiest method would be using Photoshop or Lightroom from Adobe - they natively support the HEIC file format. You can import and export your files as JPEGs/PNGs without trouble.
If you don’t have either of these, here are some well-received apps in the Microsoft Store that will take care of the conversion for you:
Can you use JPEGs on iPhones?
If you don’t want to deal with the strange, new file formats, you can also go straight to the source - your iPhone.
Here you have two options. You can set your phone up to transfer photos as JPEG files if they are incompatible with the receiving device. You can also stop your iPhone from saving photos as HEIC and choose to use JPEGs instead.
The first option is probably the best one, as you do not lose out on the advantages of HEIC files for your storage space. To transfer photos as JPEGs, you simply need to follow these steps:
- Go to your iPhone settings
- Tap on the Photos menu
- Scroll down until you see the Transfer to Mac or PC option
- Choose Automatic
However, if you do want to go back to shooting JPEGs, you can do that too. Remember that it’ll make the photos saved on your phone much bigger, taking up much more storage. You have to follow these steps:
- Go to your iPhone settings
- Tap on the Camera menu
- Tap on the Formats menu
- Switch from High Efficiency to Most Compatible


